Troubleshooting the Arousor on Pro Tools for Mac OS

Check your Activation

If you are getting any kind of authorization or validation errors either when you try to launch your DAW or use the Arousor, make sure the Arousor is properly activated to your iLok generation 2 or higher USB dongle and it is plugged into your computer. The Arousor will not operate without it. This also includes the trial. See the activation guide on the downloads page for more information


Update iLok License Manager

Go to https://www.ilok.com/#!license-manager to download the latest version of iLok License Manager. Make sure you restart your computer after it is installed.


Test the Arousor on another DAW/Format

If possible, try testing another format of the plugin. There is a VST2, VST3, AU, and AAX version of the Arousor installed to your system. If you have a second DAW like GarageBand, try opening the Arousor on it. If it works in another application there may be a problem with Pro Tools’ preferences or plug-in cache.


Reinstall the Arousor

Since there is no official Arousor reinstaller, you must delete the Arousor from the Plug-ins folder manually and then reinstall it.


  1. Close Pro Tools and launch Finder.
  2. Click Go (at the top of the screen) and select Go to Folder… or press Command + Shift + G
  3. Enter /Library/Application Support/Avid/Audio/Plug-Ins and click Go.
  4. Select Arousor.aaxplugin and delete it either by clicking and dragging it to the Trash or right clicking it and selecting Move to Trash. Enter your password if prompted.
  5. Restart your computer.
  6. Open Pro Tools so it recognizes that the plug-in is gone and then close Pro Tools.
  7. Download the Arousor installer from https://empiricallabs.com/downloads.html and reinstall the Arousor.


You may need to restart your computer again before opening Pro Tools again.

If issues persist you may need to delete Pro Tools Preferences and clear the Installed Plug-in Cache.


Delete Pro Tools Preferences

Deleting the Pro Tools files detailed below will reset Pro Tools. Before deleting any of the files as instructed below, copy them into a new folder on your Desktop called “Pro Tools Workspace Backup” as detailed in the instructions below. Returning these files back to where they were or replacing a newly created set of preferences will return Pro Tools to its past state.


  1. Close Pro Tools and launch Finder.
  2. Click Go (at the top of the screen) and select Go to Folder… or press Command + Shift + G
  3. Enter ~/Library/Preferences/Avid and click Go.
  4. Back up the Pro Tools folder by moving it to the Desktop or right click it and select Compress “Pro Tools”. This is just in case you need to bring back your old settings.
  5. Once the Pro Tools folder is backed up, delete the Pro Tools Prefs and InstalledAAXPlugins files from the original Pro Tools folder by right clicking them and selecting Move to Trash
  6. Restart your computer and launch Pro Tools.


Pro Tools 12, 2018, and 2019 on Mac OS Sierra

If you are having authorization or validation errors appearing when you launch Pro Tools 12, 2018, or 2019 on Mac OS Sierra you may need to update your operating system to Mac OS High Sierra, but do not update to Mojave or Catalina. This error occurs when after iOS 13 is installed on to your computer to.
Troubleshooting the Arousor on Logic Pro X

Sometimes when you update the Arousor from a previous version, Logic can mark the plugin as invalid. Below is a list of solutions for getting the Arousor working on your system. Try one solution at a time until the Arousor is working on your system.


Check your Activation

If you are getting any kind of authorization or validation errors either when you try to launch your DAW or use the Arousor, make sure the Arousor is properly activated to your iLok generation 2 or higher USB dongle and it is plugged into your computer. The Arousor will not operate without it. This also includes the trial. See the activation guide on the downloads page for more information.


Update iLok License Manager

Go to https://www.ilok.com/#!license-manager to download the latest version of iLok License Manager. Make sure you restart your computer after it is installed.


Perform a fresh install of iLok License Manager

To perform a fresh install, you will need to uninstall the current iLok License Manager from your computer.

The first step is to download a fresh copy of the installer from iLok.com, making sure you delete any old copies of this installer that may also be in your Downloads folder.
On a Mac, please use the “Uninstall License Support” script included in the License Support/iLok License Manager installer to uninstall.

*** IMPORTANT ***
Make sure to uninstall all anti-virus and security file-monitoring software (i.e. AVG, Avast, McAfee, Norton, etc.) before continuing with installation. These product are known to interfere with the installation and operation of our components.

After uninstalling the current version of iLok License Manager reboot the system and then run the newly downloaded iLok License Manager installer.

With the latest version of iLok License Manager installed, plug in your iLoks and perform a synchronize operation on the affected iLoks one at a time. To perform a synchronize, double-click an iLok to open its detail pane and click the “Synchronize” link. A synchronize may also be performed by right-clicking the iLok and then choosing “Synchronize” from the pop-up menu.


Reset & Rescan in Plug-in Manager

If you updated the Arousor from a previous version or you opened the Arousor for the first time without a having your iLok USB plugged into your computer, rescanning the Arousor will force Logic to revalidate it.

  1. Open Logic and go to the Plug-in Manager by clicking Logic Pro X, (at the top of the screen) hover over Preferences, and click Plug-in Manager.
  2. Find the Arousor in the list and click Reset & Rescan Selection.


Test the Arousor on another DAW/Format

If possible, try testing another format of the plugin. There is a VST2, VST3, AU, and AAX version of the Arousor installed to your system. If you have a second DAW like GarageBand, try opening the Arousor on it. If it works in another application there may be a problem with Logic or your iLok License Manager.


Reinstall the Arousor

Since there is no official Arousor reinstaller, you must delete the Arousor from the Plug-ins folder manually and then reinstall it.

  1. Close Logic and launch Finder.
  2. Click Go (at the top of the screen) and select Go to Folder… or press Command + Shift + G
  3. Enter /Library/Audio/Plug-ins/Components and click Go.
  4. Select component and delete it either by clicking and dragging it to the Trash or right clicking it and selecting Move to Trash. Enter your password if prompted.
  5. Restart your computer.
  6. Open Logic and go to the Plug-in Manager by clicking Logic Pro X, (at the top of the screen) hover over Preferences, and click Plug-in Manager.
  7. Find the Arousor in the list and click Reset & Rescan Selection. If the Arousor can not be found, Logic has already detected that it has been uninstalled and you can skip this step.
  8. Close Logic.
  9. Download the Arousor installer from https://empiricallabs.com/downloads.html and reinstall the Arousor.


You may need to restart your computer before opening Logic, or reinstalling the Arousor. If this process fails, try to Reset & Rescan the Arousor again. Otherwise, there could be compatibility issues between your DAW, your operating system, and iLok License Manager and an update may be required.

How to Uninstall the Arousor

Uninstalling the Arousor on Mac

To uninstall the Arousor on Mac, you must remove the Arousor plugin file from the following locations (if they exist on your system) by either dragging them to the trash or right clicking on them and selecting “Move to Trash”:

Arousor.component

Macintosh HD/Library/Audio/Plug-ins/Components


Arousor.vst

Macintosh HD/Library/Audio/Plug-ins/VST


Arousor.vst3

Macintosh HD/Library/Audio/Plug-ins/VST3


Arousor.aaxplugin

Macintosh HD/Library/Application Support/Avid/Audio/Plug-Ins


Uninstalling the Arousor on Windows

To uninstall the Arousor on Windows, you must delete the Arousor plugin file from the following locations (if they exist on your system):

Arousor.dll

C:\Program Files\VSTPlugins

C:\Program Files\Steinberg\VSTPlugins

C:\Program Files\Common Files\VST2

C:\Program Files\Common Files\Steinberg\VST2

C:\Program Files (x86)\Steinberg\VstPlugins (32-bit plug-ins on 64-bit systems)


Arousor.vst3

C:\Program Files\Common Files\VST3

C:\Program Files (x86)\Common Files\VST3 (32-bit plug-ins on 64-bit systems)


Arousor.aaxplugins

C:\Program Files\Common Files\Avid\Audio\Plugin-Ins

Quest for the Invisible De-Esser

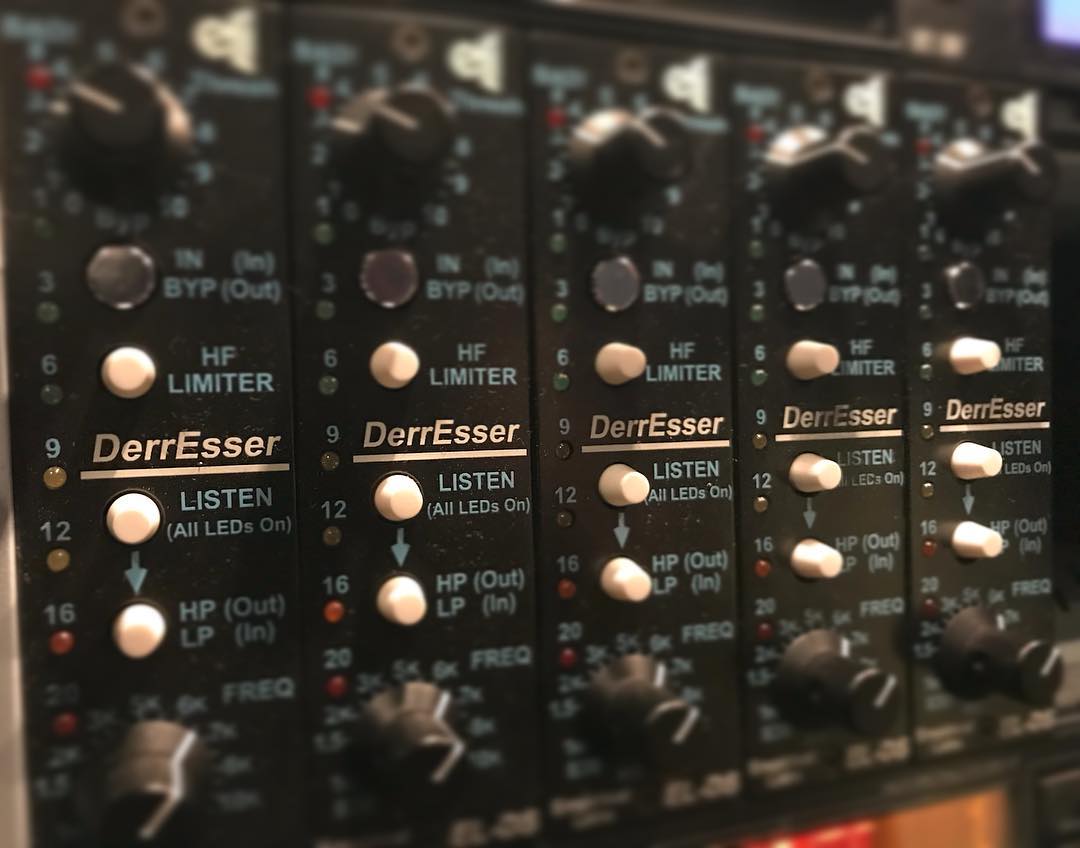
Empirical Labs uses an unusual De-Esser and HF (high frequency) limiter circuit in two of their products, the Lil FrEQ and the DerrEsser.  Folks often ask why the circuit is so invisible and easy to use, having only one threshold control and one corner frequency control.  It involves being “invisible” when not acting, and when it does act, it must act super quickly and smoothly.

There are four key parts to the circuits

1)       The Crossover – This separates the problem high frequencies from the rest of the frequencies

2)       The VCA – This controls the HF gain electronically

3)       The Detector – This determines how much and how fast the VCA turns up and down the problem frequencies.

4)       The Summer, a two input mixer, which adds the frequencies back together seamlessly.

One of the keys to “invisible operation” is a special crossover filter, dividing the audio band into Low frequencies and high frequencies band.  In order to be colorless when not in operation, the two bands must sum back together perfectly, with no phase or frequency response effects.  Fortunately, we found a minimal path circuit which can guarantee virtually perfect phase and frequency response when the circuit is not acting on a signal. We use a smooth two pole filter complimentary circuit to accomplish this, providing a 12dB per octave crossover slope on the low frequencies.

The high frequency band is then put through a VCA (voltage controlled amplifier), which is what turns the highs up and down, depending on what the detector circuitry sees, and how it is set.  One of the advantages of processing only the high frequencies is that the time constants of the gain reduction can be extremely fast, without causing mid or low frequency distortion.  This is another key to its invisible” operation.  If the high frequencies are turned down (compressed) too slowly, noticeable bursts and sibilance will get through.  And if they’re turned back up to normal level too slowly, you will hear the dropout of the high frequencies. So because it was possible to make things really fast, yet avoid severe modulation distortion, we made it act in microseconds.

We also trim out any imperfections of the gain and phase between the LF band and the HF band, guaranteeing invisibility when not acting.  Square waves are perfect when the DerrEsser is below threshold.

Another factor is layout of the PCB.  High frequencies tend to get coupled into nearby traces and components.  With gain control devices, you have to figure out how to get rid of the crosstalk you do NOT like.  Many older compressors have a lot of gain control modulation and DC feedthrough.  It is my belief that sometimes these add a nice character or musicality to the sound.  Direct modulation of a VCA control port by the audio signal usually leads to creation of 2nd harmonic (and other even harmonics).  The 2nd harmonic of highly valued vintage gear, especially class A stuff, is a very measurable artifact, and probably a subtle audible one also.  We spent time trying to figure out if feedthrough is working for the sound, or against it, and adjust the PCB layout to get the desired result.  In the case of the DerrEsser, we went for minimum control feedthrough and crosstalk, to achieve the lowest distortion and most uncolored sound.  It required a four-layer board, and several revisions to arrive at our current design.

HF LIMITER & VINYL – Much of the sound folks like about Vinyl recordings like 33RPM LPs, and 45RPM Singles is the creamy high frequencies.  When the vinyl sounds really good compared to the CD, many times it is not so much the medium, but what the Mastering and Disc Cutting people did.  I had seen a disc-cutting engineer use a Neumann BSB 74 Acceleration Limiter that did something wonderful to the high frequencies.  It too worked by dividing the audio up into two bands and limiting the high frequency one.  The crossover point was around 4KHz.  Although I couldn’t bring one home to do exhaustive tests on, I did roughly plot the HF compression curve at a mastering house by hand, many years ago.  It had a small knee before a hard limiting occurred at 10KHz.  It reacted in microseconds.  This Neumann device goes for 10’s of thousands of dollars these days.

Although our HF LIMITER in the DerrEsser and Lil FrEQ is not an emulation of the old Neumann BSB 74, it offers a very similar effect, with a lot more control over the crossover frequency, being variable from 830Hz to almost 12KHz. The knee is important for avoiding threshold modulation, and gives the HF Limiter an advantage over the De-Esser mode for general HF softening and warming, especially when acting more frequently.  It has an absolute threshold control, that just looks at how much High Frequency energy there is, and doesn’t care what the lower frequencies are doing.  When you set the threshold, you are saying I don’t want the high frequencies to get any louder than this.

– Dave

Comp Mode De-emphasis Sidechain Tricks

We occasionally get questions about the note in Pet Tricks of using the COMP MODE Sidechain De-emphasis in an alternative way.

When Emphasis is turned on, it emphasizes high frequencies before compression, then compresses and distorts, and then flattens out the high frequencies again by turning them down (de-emphasis).  When Emphasis is on, the compressor detector gets sent an emphasized signal, IE with the highs boosted.  To prevent this from making the compressor respond MORE to high frequencies, a circuit in the detector de-emphasizes the signal so it is flat.  This sidechain de-emphasisis can be used in an alternative way with hidden functions, activated by holding the COMP MODE button for 3 seconds.

If you ever get scared you do not know what state the circuit is in, all you have to do is press the Emphasis switch to cycle around back to your current setting, and everything is reset to NORMAL.

The States of the Emphasis using COMP MODE extended Options.  Start with COMP MODE normal, no LED’s on.

  1. Press COMP MODE once to turn Emphasis ON, turning on the Emphasis throughout the unit. Compressor responds normally.
  2. Hold COMP MODE button in for 3 seconds, the red Link LED will flash twice, and now the sidechain de-emphasis is turned OFF, making the compressor respond much more to high frequencies.  It is equivalent to boosting the highs in the sidechain of the compressor. It can help control harsh passages or source material.
  3. Pressing COMP MODE button again and the unit goes into normal LINK, with Emphasis off everywhere, operating normally.
  4. Hold COMP MODE Emphasis Button for 3 seconds, and the Yellow HF Emphasis LED flashes twice, and the sidechain deemphasis is turned ON, making the compressor respond LESS to high frequencies, but still in LINK for stereo.
  5. Pressing the COMP MODE button again, turns on Emphasis and Link, compessor operating normal.
  6. Hold COMP MODE button in for 3 seconds, the red Link LED will flash twice, and now the sidechain de-emphasis is turned OFF, making the compressor respond much more to high frequencies, while still linked
  7. Pressing the Emphasis Button again returns the unit to normal mode, No Emphasis, No LINK.
  8. Holding COMP MODE switch in normal mode (No LEDs On) for 3 seconds, the Yellow HF Emphasis LED flashes twice, and the sidechain deemphasis is turned ON, making the compressor respond LESS to high frequencies.


When you hold the COMP MODE switch and the yellow HF Emphasis LED flashes, you have turned on the sidechain de-emphasis circuit.  When you hold the button and the Red LINK LED flashes, you have turned OFF the sidechain de-emphasis.  And again, you can return to default mode by pushing the COMP MODE several times to cycle around.

Stereo Image Link Tips and Tricks

The original Distressor stereo link implementation used a summing and phase detection method which allowed stereo image shifting. “Image shifting” occurs when the interchannel balance (the relative volume between Left and Right channels) changes during compression. Although known for its phase correction, and its “thickening” on open room mics and other stereo sources, this approach has sometimes been a problem on stereo program material where the producer/engineers want to maintain absolute left/right balance at all times.

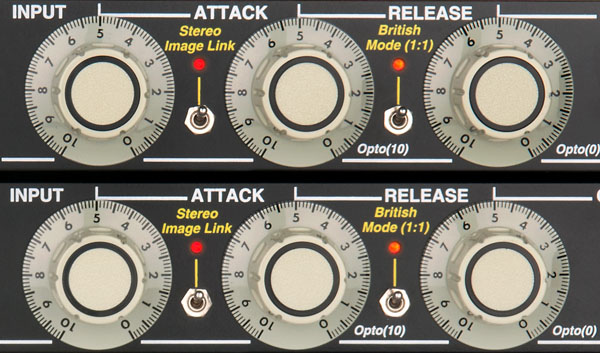
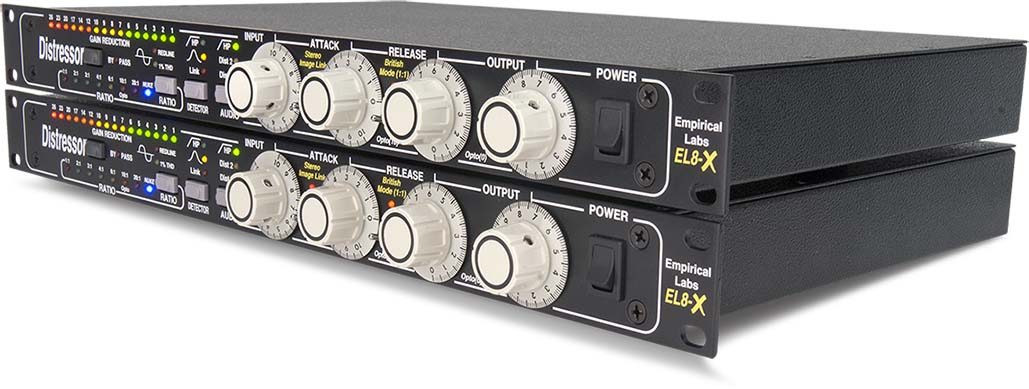
With the new “Stereo Image Link” option, the Distressor user now has three link options – the original “phase” link, the new Image Link and the combination of the two, phase and image linking. This has never before been offered on any compressors or limiters. There can be very slight differences in the metering between the two units. Due to the high resolution of the Distressor’s metering, 1/10th dB can make an LED on one unit go on or off earlier than the other unit’s. Also, don’t readjust knob alignment – the output pots especially. They are often offset around “0” to allow for “dead spots” at the lower extremes.


How to use the new Stereo Image Link Option for the first time

You must now use two stereo phone plugs in the link cabling. This means standard TRS phone plugs. They are supplied when you purchase the option. Plug one unit’s Link Out to the other’s Link In, and vice versa. Both units must have the “Stereo Image Link” switch on (both switches should be in the up position and the LEDs should be lit). The engineer must still match the units’ front panel controls usually, but the units will now always match in their gain reduction amount – eliminating image shift. The most important thing the user must do is match the left and right input and output levels. If no change is going to be made to the left/right balance, using a tone to set the left right I/O levels is very direct and useful. See below.

Tips

Setting I/O levels – It is suggested that you set both units to their general expected settings, with Stereo Image link engaged, apply an identical tone to both Distressors, and adjust the inputs nearly the same, then “tweak” the outputs so that the output levels are identical. Use the meters on your board or recorders. This will ensure that the interchannel levels remains unchanged. Also, with the new linking, it is not as critical to match either the input or outputs, since the gain reduction between the two channels is locked, and therefore once the overall throughput levels are matched, they will remain that way. However, the units can respond more to the louder channel if the input levels are not matched closely.

Tricks

* First, there is no limit to how many units can be linked – in theory. However, you must avoid long link cables since they will cause noise and degradation of operation. To wire up more than two units, go from the link output of the 1st unit’s link to the next units link input, then take that units link out to the next ones input etc. Finally, take the last units link out and feed it back to the first units link in. Again, your must use stereo phone plugs for the new “Stereo Image Link” to work.

* Try putting the lower unit into 1:1 mode with attack and release on 10. Then still matching the I/O levels, use the upper unit to select ratio and attack/release times. This will allow a longer attack time then otherwise available, since the top unit must drive both units timing circuitry. The down side is that the units will only respond to the top units signal, unless the original link is engaged (see below). There are a few well known compressors that have a master/slave mode that only looks at the “master units” audio – so this is not unheard of. You may switch the units and have the bottom one control the top unit (which is in 1:1 mode). Also, using the original link will sum both channels partially, so that there is some response to the “slave” units audio. This longer (slower) attack time is sometimes very useful on program material – a la SSL type compression.

* By not matching the units front panel controls – whole new ratios can be obtained. For instance, putting the left channel on 2:1 and the right channel on Nuke (pretty radical but..), then setting the left and right levels differently, you can get a combination of two ratio curves. Usually the lowest attack/decay settings will override the higher settings, i.e. if one channel has the attack set to 10 and the other to 3, the units will generally react at the faster 3 setting.

* If for some reason no TRS stereo link cables are available, one may use a regular guitar cable to enable the new link. But you only insert the cable part way into the rear Link connectors – so that only the ring is in contact with the tip of phone plug. The normal EL8 link will be sacrificed, however, since it relies on the tip of the link connectors to be connected. It is probably best not to put the unit in normal link (in the Det area) since it will make the unit operate with more distortion without the tip connections – then again this mite be the perfect spice for your gumbo!


Brit Mode Tips and Tricks

The original concept of the “British Mode” came from an unusual setting on the classic UREI LN1176 limiter. The unit was designed to have only four ratios, each ratio being engaged by selecting one of four buttons. However, as early as 1980 (or before), renegade recording engineers, always on the lookout for something a little more “over the top”, found that you could make all four buttons stay “in” if you pressed them just right. What resulted was a very, very aggressive sound that had some elements of the units 20:1 ratio, but with an unusual knee and new envelope shape. Somewhere along the line, someone called it a “British Mode” and the name has stuck. It is also called “all buttons in” and some other intuitive names.

The Distressor has the advantage of being able to apply this “aggressive” nature not only to the new British ratio (1:1) but also to all the ratios since a separate switch is installed, which can be enabled with any ratio.  One should keep in mind however, that an attack below 3 or 4 is required to maintain the LN1176 character.  If you go above an attack of 3 you will also incur a rise in some grunge (distortion) and see the THD indicator lites come on a lot more. The Distressor will no longer behave smoothly, nor like an 1176.

How to use the new British Mode Option for the first time

Put the unit in the 1:1 ratio and turn on the British Mode Switch (flip it up and the LED should be lit). That enables it. To sound like the 1176 the only constraint is to keep the attack well under 4 on the Distressors – their attack can go much longer than the 1176. Now you will find that the unit has a new attitude! The attack and release will generally be more aggressive and the unit will get in and out of the way very quickly. Interestingly, the unit will be slightly less colored when not compressing.

Tips

Use this ratio to “skim” peaks. This means that most of the time it may not be doing anything, but when it does “hit” the signal, it will smoothly push back the signal and then get right out of the way again. If you are hitting the Gain Reduction all the time with the British mode on, you are going to be really “squashing” the signal. On the other hand, the Distressor will sound fairly subtle when compressing all the time in 2:1 mode, especially with a slower attack (>6).

Tricks

Vocals! – This is a great final compression during mixdown. When not working it is very transparent, but when a vocal pops out and hits the compression, the British mode will get in and out of there quickly and smoothly. When you are really compressing a lot, breaths and background noises will become very loud (pushed up). There is not much you can do with this except gate before compression maybe or, mute or erase the noises and breaths out that you don’t want to hear. Remember that breaths are natural and can add a lot of excitement sometimes, so don’t gate or erase them by default. If you can, back up a vocal track before you start trying to punch out breaths and noises etc.

WHAT PEOPLE SAY ABOUT THE BRITISH MODE MODIFICATION

For those who have come to love and depend on the sound of the Distressor, the new British mode turns it into a new fun loving animal.

At the flick of a switch, the Distressor becomes more aggressive and stressful on any instrument you desire.

Dave Derr should win the “t**s” award for coming up with such a nice but nasty box. – Michael Brauer

A short while ago, I spoke to Judy there about the Stereo Image Link & the British Mods. Both are major enhancements to the Distressor, the British sound being a kind of hard drug! You hear it once, & then you can’t imagine using a Distressor without it…  J